
Gas Water Heater Installation in Reading
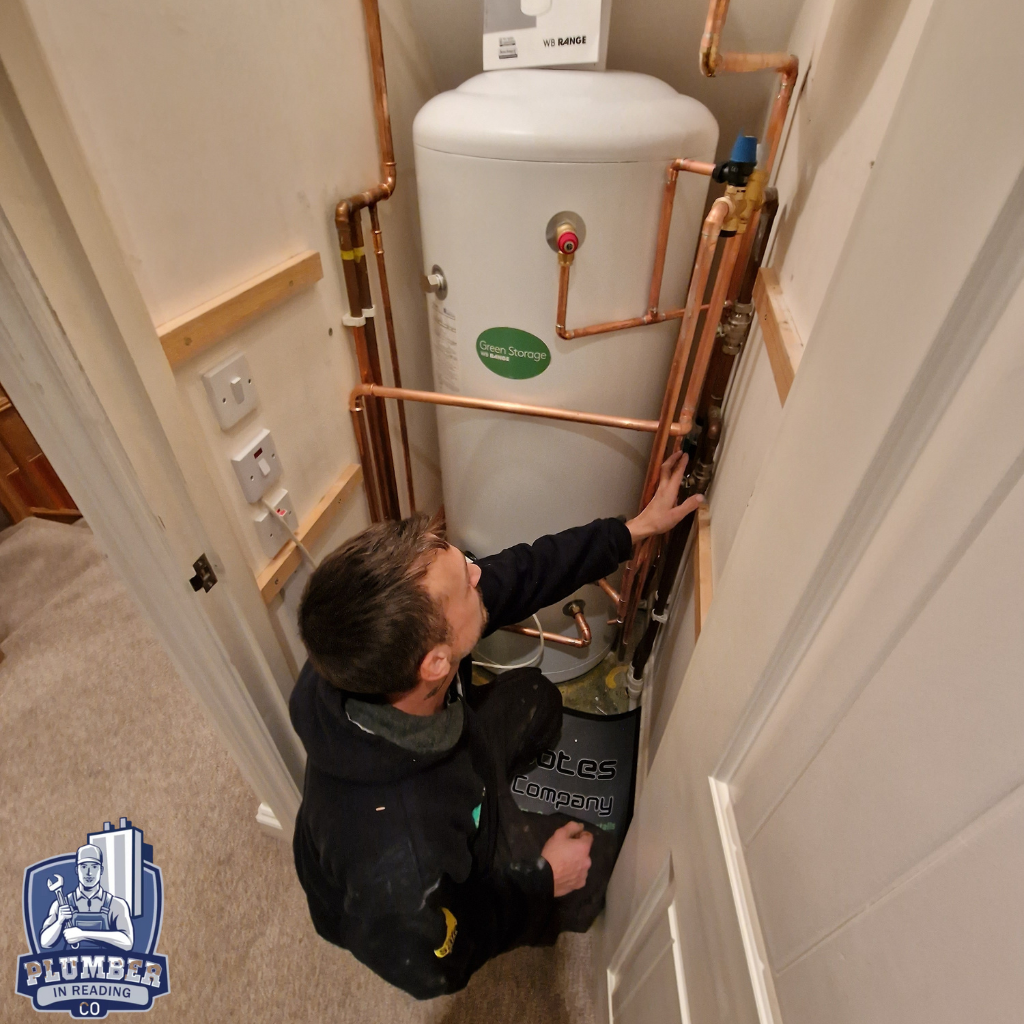
The installation of a gas water heater is a critical task that requires precision and expertise. Proper installation not only ensures optimal performance but also guarantees safety. The complexity of this process involves multiple steps, each requiring specific skills and an understanding of both mechanical and safety protocols. When it comes to gas water heater installation in Reading, engaging a professional service like Plumber in Reading LTD can make all the difference. This water heater guide explores the intricacies of water heater setup, broader gas appliance installation practices, and provides practical installation tips to ensure a seamless and safe process with support from local gas installers. The installation of a gas water heater involves several steps that require careful attention to detail. It is imperative to understand the entire process to appreciate the value of professional intervention. A typical installation involves gas appliance setup, connecting it to the gas supply, and ensuring proper ventilation. These steps are crucial to preventing any potential hazards and to ensuring that the heater operates efficiently. Each step requires precision and a deep understanding of the system’s requirements to avoid future issues. Moreover, the installation process is heavily regulated by safety standards and local building regulations, which means that compliance is not optional but mandatory. Incorrect installation can lead to serious safety risks, including gas leaks and potential carbon monoxide poisoning. Therefore, the role of a skilled professional cannot be overstated, as they bring both expertise and an understanding of these critical safety considerations. The Importance of Professional Installation While some homeowners may be tempted to undertake the installation themselves, the complexities involved often necessitate the expertise of a professional. As a leading name in Reading plumbing services, Plumber in Reading LTD offers experienced technicians who understand the nuances of gas appliance setup and gas appliance installation. Their expertise ensures that all safety protocols are adhered to, minimising the risk of gas leaks and other potential dangers. Furthermore, professional installation often includes warranties that protect your investment, giving you peace of mind. In addition to safety, professional installers bring efficiency and reliability to the table. They have access to specialised tools and equipment that may not be available to the average homeowner. This ensures not only a proper installation but also one that is performed swiftly and with minimal disruption to your daily routine. In the long run, hiring a professional can save you time, money, and stress. Safety Considerations Installing a gas water heater is not just about connecting pipes and wires; safe gas heater installation also involves a thorough understanding of gas flow dynamics and ventilation requirements. The team at Plumber in Reading LTD is well-versed in these aspects, ensuring that every installation complies with local regulations and safety standards. They are trained to identify potential hazards and take corrective actions before they become issues. Safety considerations also involve ensuring that the correct materials and components are used during the installation. Using substandard materials can lead to premature failure of the system or even hazardous situations. The professionals at Plumber in Reading LTD use only high-quality parts and adhere to strict guidelines to ensure the safety and durability of your water heater installation. Steps Involved in Gas Water Heater Installation Site Preparation Before the actual installation begins, it is essential to prepare the site where the home water heater will be installed. This includes ensuring adequate space for the unit and sufficient ventilation. The area should be free from combustible materials and should have a stable floor to support the weight of the heater. Proper site preparation is critical not only for safety but also for the efficient operation of the heater. Additionally, site preparation may involve making modifications to the space to accommodate the new unit, such as installing a new gas pipe or expanding the existing ventilation system. This phase may require coordination with other contractors, especially if structural changes are necessary. Having a professional handle this ensures that all aspects of the preparation meet the necessary standards and requirements. Positioning the Heater Once the site is prepared, the next step is to position the heater. This involves placing the heater in a manner that allows for easy access to the gas and water connections. Correct positioning is crucial for maintenance and in case of any repairs. It also ensures that the heater operates efficiently, as incorrect placement can hinder its performance. Positioning also involves considerations for future maintenance and potential repairs, ensuring that the unit is easily accessible for servicing. The installation team will ensure that the heater is positioned in accordance with the manufacturer’s recommendations and local building regulations, which helps in prolonging the lifespan of the appliance. Connecting the Water Supply Connecting the water supply involves attaching the inlet and outlet pipes to the heater. This step requires precision to prevent leaks. The technicians at Plumber in Reading LTD use high-quality materials and fittings to ensure a secure connection. Proper water supply connection is crucial to avoid water damage and to ensure the efficient operation of the heater. Moreover, the professionals will also check the water pressure and ensure that it is within the recommended range for the heater model being installed. This step is vital, as incorrect pressure can lead to operational issues and reduce the lifespan of the appliance. Regular inspections and maintenance can help in identifying potential problems early on. Gas Supply Connection The gas supply connection is one of the most critical aspects of the installation. It requires a thorough understanding of gas lines and pressure requirements. A secure connection is vital to prevent gas leaks and ensure efficient operation. The professionals at Plumber in Reading LTD are trained to handle these connections with the utmost care. They will also conduct pressure tests to confirm that the connections are secure. Additionally, the installation team will ensure that the gas supply is compatible with the heater model and that all connections adhere to local safety regulations. This step is essential not only for safety
What Metal is Used for Pipes in Plumbing in Houses
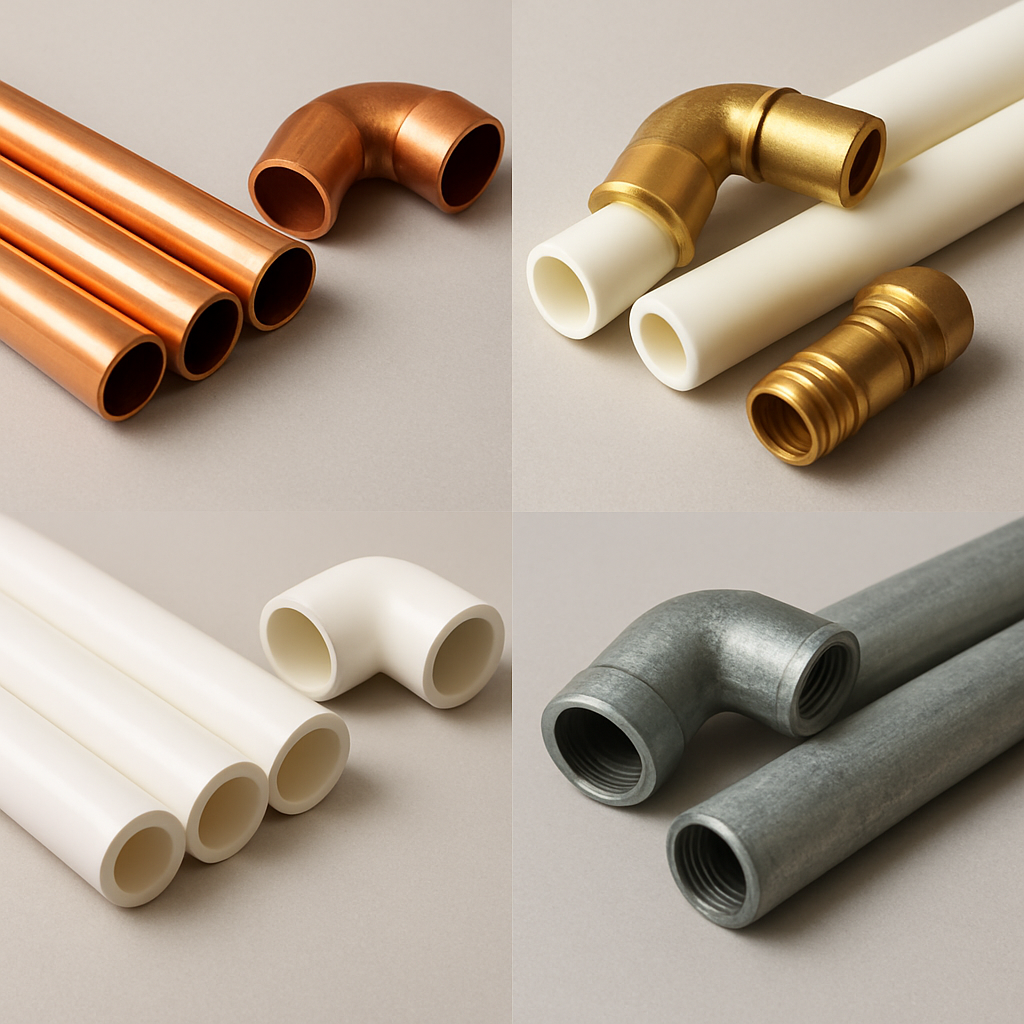
Choosing the right plumbing pipes is crucial for a home’s plumbing system. Different metals offer unique benefits and drawbacks. Copper, galvanised steel, brass, and stainless steel are common choices. Each has its own set of advantages and disadvantages. Understanding these materials helps in making informed decisions. Homeowners and professionals alike benefit from knowing the best options. This guide explores the metals used in residential plumbing. It provides insights into their applications and suitability. By the end, you’ll have a clearer understanding of plumbing pipe materials. This knowledge aids in selecting the best fit for your needs. Overview of Plumbing Pipe Materials Plumbing systems rely on a variety of materials, each chosen for specific properties. Metal pipes are preferred for their strength and durability. Traditionally, several metals have been utilised in plumbing. Copper, galvanised steel, brass, and stainless steel remain popular choices. Each offers unique benefits, making them suitable for different plumbing requirements. Modern plumbing also includes non-metal options. PEX, PVC, and CPVC pipes provide flexible and cost-effective alternatives to metal. They are often chosen for ease of installation and affordability. When deciding on plumbing materials, consider factors like longevity, cost, and application. Here’s a brief list of common metal plumbing pipes: Balancing these considerations ensures a reliable and efficient plumbing system. Copper Pipes: The Gold Standard in Residential Plumbing Copper pipes have been a staple in residential plumbing for decades. Their impressive strength and reliability have made them a top choice. Homeowners favour copper for its excellent corrosion resistance. Input (British English): This metal doesn’t rust easily, ensuring longevity and safety in water supply lines. Additionally, copper is known for its heat tolerance. It’s ideal for both hot and cold water pipes, providing versatility and consistent performance. While copper pipes can be more expensive than alternatives, their durability justifies the investment. Their long-term benefits often outweigh the initial costs. Here are key features that make copper pipes a top choice: Ultimately, copper stands out as a reliable material for residential plumbing, providing peace of mind in any plumbing system. Types of Copper Pipes: Rigid vs. Flexible Copper pipes are available in two primary forms: rigid and flexible. Each type has specific uses and advantages. Rigid copper pipes are sturdy and often used for new water lines. Their strength ensures long-lasting, stable installations. Flexible copper pipes are used in tight spaces. Their bendability allows them to navigate around obstacles. Here’s a quick comparison: Both types serve critical roles in modern plumbing systems, accommodating diverse installation scenarios. Advantages and Disadvantages of Copper Pipes Copper pipes offer numerous advantages. Their resistance to corrosion and high temperatures makes them highly reliable. Another plus is copper’s recyclable nature. This supports environmentally friendly practices in plumbing installations. However, copper pipes can be pricey. They sometimes cost more than alternative materials like PEX or PVC. Here’s a summary of the pros and cons: Advantages: Disadvantages: Choosing copper involves weighing these factors to align with your plumbing needs and budget. Galvanised Steel Pipes: Once Common, Now Rare Galvanised steel pipes were a popular choice in homes from the early 20th century. They offered an affordable solution and were widely installed in residential plumbing systems. These pipes have a zinc coating designed to prevent rust. However, over the years, they’ve become less desirable due to several drawbacks. Modern homeowners and plumbers often avoid galvanised steel. Issues like rust, mineral build-up, and water discolouration are common concerns. Here’s why they have fallen out of favour: With these limitations, newer piping materials are now preferred in home plumbing systems. Issues with Galvanised Steel Pipes Galvanised steel pipes face several significant issues. Their zinc coating can deteriorate, leading to rust and corrosion. Water quality is often a concern, as these pipes can release particles. These particles may discolour water and affect taste. Key problems include: Overall, understanding these issues helps in making informed decisions about plumbing upgrades. Brass Pipes: Durable and Reliable Brass pipes stand out for their durability and superior rust resistance. They are often preferred in plumbing systems that require longevity. One of the key benefits of brass is its ability to withstand high water pressure. This makes it an excellent option for main water lines. Brass also offers a long service life, often outlasting other materials. It’s known for being easy to work with and having a reduced risk of leaks. Benefits of brass pipes include: Homeowners value brass for both its aesthetic appeal and its functional reliability, ensuring a stable plumbing system. Stainless Steel Pipes: Modern and Resilient Stainless steel pipes are known for their sleek appearance and strength. They’re often used in areas exposed to harsh conditions due to their remarkable corrosion resistance. Stainless steel is particularly favoured where aesthetics and performance converge. Key characteristics of stainless steel pipes include: While more costly than other materials, their resilience offers peace of mind. This makes them a valuable investment in high-quality plumbing solutions. Lead Pipes: A Hazard of the Past Lead pipes were once popular in plumbing systems due to their pliability and ease of use. However, they posed significant health risks linked to lead exposure. Consequently, their use is now banned. Important facts about lead pipes include: Non-Metal Alternatives: PEX, PVC, and CPVC Non-metal pipes have gained popularity for their versatility and cost-effectiveness. One of the top choices is PEX, a flexible plastic pipe ideal for retrofits and tight spaces. Its ease of installation and resistance to limescale make it a favourite among homeowners. PVC, commonly used for waste pipes, is lightweight and affordable. It’s ideal for non-pressurised applications and stands out for its durability. CPVC shares similar features with PVC but has enhanced thermal resistance, making it suitable for hot water pipes. Non-metal plumbing options include: Comparing Metal and Non-Metal Plumbing Pipes Choosing between metal and non-metal pipes depends on several factors. Metals like copper and stainless steel offer robust durability and longevity. Non-metals such as PEX, PVC, and CPVC provide flexibility and a lower price point, appealing to budget-conscious buyers. Each type has its
Is a Leaking Condensate Pipe Dangerous?
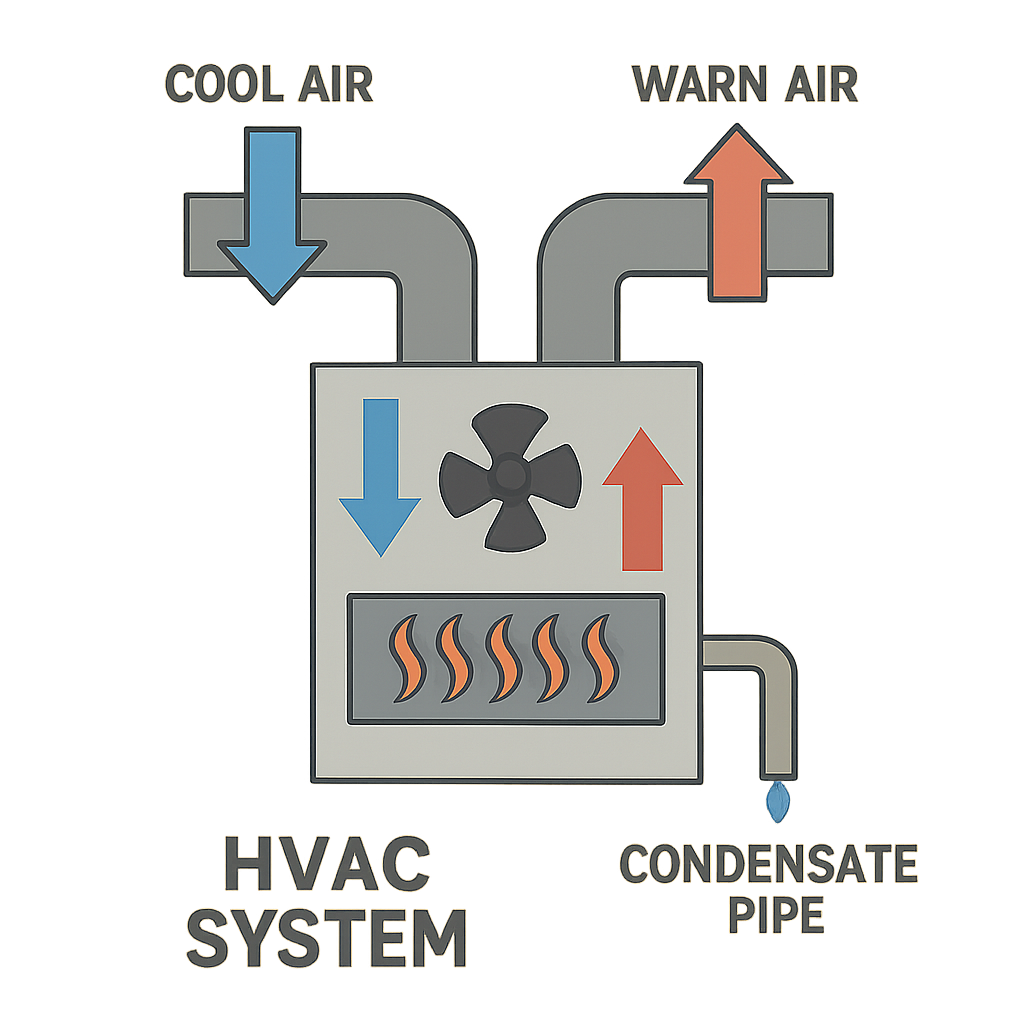
A leaking condensate pipe might seem minor, but it can lead to serious issues. These pipes are part of your HVAC system, designed to drain excess moisture. When they leak, they pose risks of water damage to your home. Moisture damage from leaks can cause mould growth, which is a health hazard. Mould can spread quickly, affecting air quality and causing respiratory issues. Water damage can also weaken your home’s structure over time. This can lead to costly repairs and even compromise the safety of your home. Increased humidity from leaks can damage belongings and create discomfort. It’s crucial to address leaks promptly to prevent these problems. Regular maintenance of your HVAC system can help prevent leaks. Understanding the signs of a leaking condensate pipe is key to protecting your home. What is a Condensate Pipe and How Does it Work? A condensate pipe is an integral component of HVAC systems. Its primary role is to channel and expel excess moisture generated during system operation. This moisture forms when your HVAC system cools or dehumidifies air. This pipe typically runs from your HVAC system to the outside of your home. It prevents water accumulation, which could lead to damage. Without this pipe, the moisture would have nowhere to go, increasing water damage risks. The process works through condensation. As warm air passes over cold evaporator coils, it cools down and moisture condenses. This water then drains away via the condensate pipe. Key functions of the condensate pipe include: Ensuring the condensate pipe is functional can help keep your HVAC system efficient. Proper operation of this pipe prevents both moisture and structural damage. Common Causes of Condensate Pipe Leaks Leaks in condensate pipes can arise from several common issues. One prevalent cause is blockages, often due to debris or algae build-up inside the pipe. These blockages prevent water from draining properly, leading to leaks. Corrosion is another factor that contributes to leaks in condensate pipes. Over time, pipes can degrade, resulting in cracks or holes through which water can escape. Improper pipe installation is also a frequent culprit. If the pipe is not correctly aligned or secured, leaks may occur. Ensuring a correct slope is crucial for effective drainage. Physical damage to the pipe, perhaps from external forces or pressure, can cause leakage as well. Here are some typical causes of leaks: Identifying these issues early can save homeowners from extensive repairs. Regular inspection of the condensate pipe can help in detecting potential problems before they escalate. Signs and Symptoms of a Leaking Condensate Pipe Recognising the signs of a leaking condensate pipe is key to preventing severe damage. Water stains appearing on walls or ceilings can indicate a leak. These stains are often discoloured patches caused by the water seepage. Dampness around the HVAC unit is another common symptom. If the area feels unusually moist, it may indicate a leak. Unpleasant odours are a subtle yet significant sign. Stagnant water from leaks can result in musty smells in the home. Listen for unusual sounds such as dripping or gurgling noises near the HVAC system. These can suggest water is not flowing properly. Here’s a quick checklist for spotting leaks: Regular checks can help catch these indicators early and prevent costly repairs. Is a Leaking Condensate Pipe Dangerous? Yes, a leaking condensate pipe can be dangerous. It poses several risks to your home’s safety and integrity. Water seeping from a leak can slowly cause structural damage. Over time, wooden components may warp or rot. Metal parts can corrode, leading to further issues. Additionally, leaks can increase humidity levels indoors. This creates an uncomfortable living environment and potentially damages belongings. Moisture from leaks encourages mould growth. Mould not only harms surfaces but can also compromise air quality, posing health threats. Electrical systems might be at risk too. Water damage can lead to short circuits, creating fire hazards. Here are the dangers associated with leaking pipes: Leaks can also result in financial strain. Increased utility bills due to inefficient HVAC operation is common. Repairing extensive water damage can be costly if not addressed promptly. Financial repercussions of leaks include: By addressing condensate pipe leaks early, you can safeguard your home and health whilst saving money in the long run. Water Damage Risks from Leaking Condensate Pipes Leaking condensate pipes may lead to severe water damage risks in homes. Water can seep into floors, walls, and ceilings. Over time, this can weaken structural components, leading to costly repairs. Another risk involves the home’s interior finishes. Wallpaper and paint may begin to peel or bubble. This not only affects aesthetics but also decreases property value. Additionally, water damage can lead to the growth of mould and mildew. These fungi thrive in damp environments and can spread quickly. Their presence can cause health problems and further structural damage. Furniture and personal belongings are also at risk. Water can stain, warp, or ruin items near the source of a leak. Damage can extend to electronics and appliances, potentially leading to malfunctions. Key water damage risks include: Early detection and repair of leaks are crucial. Addressing issues promptly can mitigate the extent of water damage. Maintaining the health and safety of your home depends on proactive measures. Moisture Damage and Its Impact on Your Home Moisture damage occurs when water vapour accumulates in areas it shouldn’t. Leaking condensate pipes contribute significantly to this issue. Prolonged exposure to excess moisture can lead to pervasive damage in homes. One major impact is the deterioration of building materials. Wood, plasterboard, and insulation can absorb moisture and degrade. This can compromise the home’s structural integrity over time. High humidity levels, facilitated by leaks, create a welcoming environment for pests. Insects such as termites thrive in moist conditions. Their presence can result in additional damage and expenses. Moisture can also cause finishes and fixtures to fade or warp. This affects the visual appeal of a space and requires repair or replacement. Preserving home aesthetics hinges on effective moisture control. Key impacts of
How to Release Push Fit Plumbing Fittings
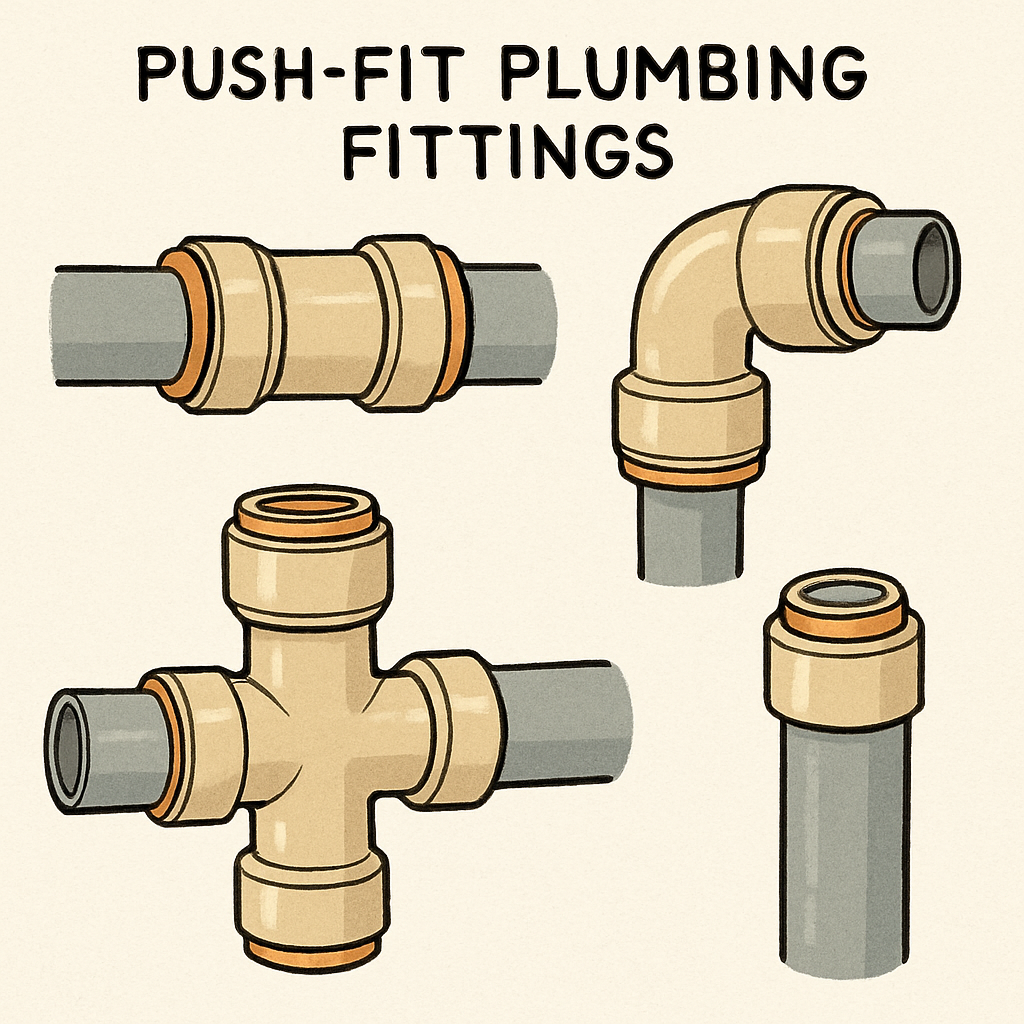
Push fit plumbing fittings are a game-changer for DIY enthusiasts and homeowners. They offer a quick and easy way to connect pipes without the need for soldering. These fittings are popular for their simplicity and efficiency. They are used in both copper and plastic plumbing systems. Understanding how to release push fit plumbing fittings is essential for any plumbing project. It ensures you can make adjustments or repairs when needed. This guide will walk you through the process step-by-step. You’ll learn about the tools required and the techniques involved. Whether you’re a beginner or have some experience, this guide will help you master the task. With the right knowledge, you can handle plumbing tasks with confidence. Let’s dive into the world of push fit plumbing fittings and discover how to release them effectively. What Are Push Fit Plumbing Fittings? Push fit plumbing fittings are essential components used to join pipes quickly and efficiently. They eliminate the need for welding or adhesives, making them ideal for both novice and experienced plumbers. These fittings are compatible with various plumbing materials, including copper, PEX, and CPVC. This versatility allows them to be used across different plumbing systems. Push fit fittings are popular due to several advantages: These fittings use an O-ring and a gripping mechanism to create a watertight seal. The O-ring is crucial as it prevents leaks and ensures durability in various water systems. Their user-friendly design makes them perfect for tight spaces or quick fixes. Whether you need a temporary repair or a permanent solution, push fit fittings are a reliable choice. They simplify complex plumbing tasks, bringing convenience and efficiency to your home projects. How Push Fit Fittings Work: The Basics Understanding the mechanics of push fit fittings helps ensure a secure installation. These fittings create a seal using a combination of an O-ring and a gripping mechanism. This design ensures a leak-proof connection in both water and gas applications. The process begins when a pipe is inserted into the fitting. The pipe pushes past a series of metal spurs inside the fitting. This action locks the pipe in place while the O-ring creates a watertight seal. Key features of push fit fittings include: These features make push fit fittings a popular choice for both new installations and repairs. Their user-friendly design eliminates the need for bulky tools or extensive training. This ease of use makes them especially appealing for quick fixes and DIY projects. The versatility of push fit fittings enables efficient connections while maintaining reliability and durability. Tools and Accessories Needed to Release Push Fit Fittings Releasing push fit fittings requires specific tools to ensure precision and safety. The most essential tool is a disconnect clip or tongs designed for the fittings. This tool compresses the release collar, allowing the fitting to detach from the pipe with ease. Before starting the process, it’s important to gather additional plumbing accessories. You may need a pipe cutter for trimming, as well as a deburring tool to smooth pipe edges after removal. These tools help prepare the fitting and pipe for either reattachment or new installations. Here is a list of common tools and accessories: Having these tools readily available simplifies the process. This readiness not only ensures a hassle-free experience but also enhances the overall quality of your plumbing task. Proper tools are crucial for effective and safe removal of push fit fittings. Step-by-Step Guide: How to Release Push Fit Plumbing Fittings Releasing push fit plumbing fittings is a straightforward task when done correctly. The key is to follow a systematic approach. Ensuring that you have the right tools and a clear plan is essential. Firstly, make sure to turn off the water supply. This is crucial to prevent leaks and flooding. Always double-check that the water is off before proceeding. Use the disconnect clip or tongs on the fitting’s release collar. These tools are designed to apply even pressure around the collar. Ensure the tool is properly positioned for effective compression. Gently push the tool against the release collar while pulling the pipe. The pipe should slide out effortlessly when done correctly. It’s important not to force it, as this could damage both the fitting and the pipe. To check for leaks, inspect the area once the pipe is removed. Use a cloth to wipe away any moisture. Be thorough, as this ensures no future water damage. Before reusing the fitting, inspect it for signs of wear or damage. Look for any visible cracks or debris. If the fitting looks compromised, replace it immediately. For guidance, here are the essential steps summarised: If reusing the fitting, ensure that the pipe ends are smooth and clean. Use a deburring tool if necessary, preparing them for a reinstallation. This step guarantees a watertight seal when reattached. Taking your time and following each step carefully is essential. It ensures a successful fitting release without damage. With practice, releasing push fit fittings becomes a quick and simple task. Tips for Removing Push Fit Copper Plumbing Fittings When working with push fit copper plumbing fittings, extra care is required. Copper is a durable yet malleable material. Handling it gently prevents unnecessary damage. Use a proper disconnect tool designed for copper fittings. This tool ensures a smooth removal process without damaging the pipe. It is essential for maintaining the integrity of copper pipes. Before removal, prepare the area by cleaning the pipe and fitting. Any debris can hinder the release process. A clean working environment contributes to a more successful outcome. Here are some helpful tips: Remember, patience is crucial when dealing with metal pipes. Carefully executing each step ensures a quick and successful removal process. Following these tips makes handling copper fittings less daunting. Troubleshooting: Common Problems and Solutions Facing issues while removing push fit plumbing fittings is not uncommon. Input (British English): These problems usually arise from incorrect techniques or suboptimal conditions. Understanding these challenges helps in finding effective solutions. A frequent issue is leakage after reinstallation. This often occurs when the