How to Increase Pressure on Worcester Boiler Without Key
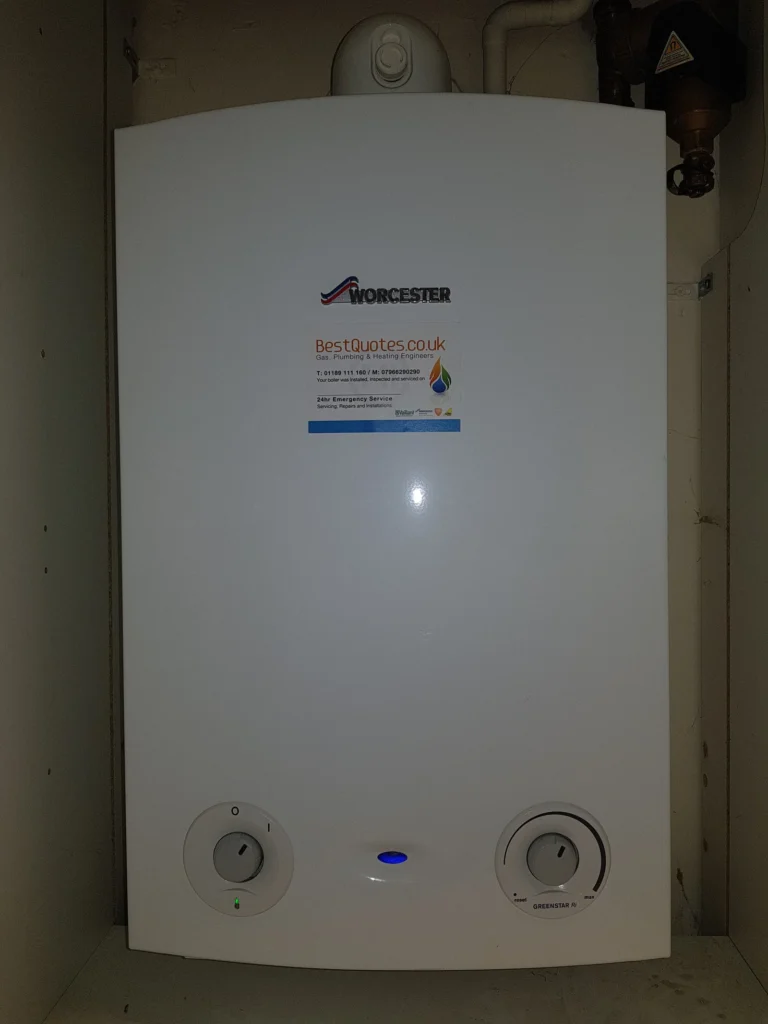
Is your home getting colder while a blue light flashes ominously on the boiler casing? There are few things more stressful than realizing your heating has stopped because of a boiler lockout due to low pressure, especially when you cannot find the specific white plastic key usually required to fix it. This frantic search often begins when the display flashes the Worcester boiler EA fault code troubleshooting sequence, leaving homeowners shivering and assuming they need a professional repair. Fortunately, common plumbing practices show that many systems bypass this proprietary key entirely. Instead of the internal mechanism, your setup likely uses an external filling loop—a flexible silver hose located just underneath the unit. Think of this component as a simple bridge connecting your mains cold water to the heating system, allowing you to top up the water levels without needing any branded tools at all. Restoring your Worcester boiler pressure is simply a matter of identifying this loop and managing the flow until the gauge hits the “green zone.” You can get the needle back to a stable 1.5 bar and restore your hot water within minutes. Why Your Worcester Boiler Pressure is at Zero And What the Gauge is Telling You Before touching any valves, take a close look at the circular dial on the front of your unit. This gauge measures internal resistance using a unit called “bar,” which functions much like the air pressure in your car tyres—too little, and the system can’t circulate heat; too much, and it strains the components. Most Worcester Bosch boilers are designed to operate safely only when there is enough water to move the needle out of the zero zone. Modern heaters include a safety mechanism called “lockout” to prevent expensive damage. If the sensor detects the pressure is too low, it cuts the ignition to stop the internal components from burning out dry, often resulting in common Worcester boiler problems like a flashing blue light. You can diagnose the status of your system by checking these zones: Don’t be alarmed if you notice a boiler pressure rise while the heating is running; hot water expands and takes up more space, temporarily pushing the needle higher. However, a gauge resting at zero when the pipes are cold means the system needs a top-up. Since the internal filling key is missing, we need to identify the standard plumbing part that bypasses that requirement entirely. Spotting the Secret External Filling Loop: No Key Required While the white plastic key is the “official” tool for specific Worcester models, many professional installers fit a universal backup system during the initial setup to make future maintenance easier. This alternative method uses a standard plumbing part located outside the boiler casing, meaning you can bypass the proprietary key entirely. Often, this component is tucked away inside the utility cupboard or situated directly below the white metal box of the boiler itself. Scan the pipework underneath your unit for a flexible, silver pipe that looks distinct from the rigid copper pipes around it. This part, technically known as an external braided hose connection, acts as a temporary bridge between your home’s main water supply and the heating system. When locating the filling loop on a Worcester boiler, use this checklist to confirm you have found the right component: Safety is the priority before you touch any valves. Reach out and gently twist the metal nuts at both ends of the silver hose to ensure they are hand-tight; if they are loose, water will spray into the room rather than into the boiler. Once you have confirmed the hose is secure and the connections are dry, you are ready to repressurise the system without triggering the safety valve. The Quarter-Turn Technique: Safely Increasing Pressure in 3 Steps Controlling the flow of water requires a gentle touch rather than brute force. Most external loops feature two small valves—one at each end of the silver hose—which must both be opened to allow mains water into the heating circuit. Position yourself so you can clearly see the pressure gauge, then locate the handle on the valve connected to the mains water pipe. If the handle is perpendicular (forming a ‘T’ shape) to the pipe, it is closed; slowly rotating it a quarter-turn until it aligns parallel with the pipe prepares the system for filling. Once the supply side is open, you will use the second valve to control the actual flow rate. Slowly turn this handle while keeping your eyes locked on the boiler’s pressure gauge, stopping the moment you hear the distinct hiss of water rushing through the hose. This sound confirms water is successfully entering the system, but patience is vital here. Rushing this step can cause the needle to shoot past the target zone into the red, triggering the pressure relief valve, so keep the flow steady and moderate. Allow the pressure to build gradually until the gauge needle climbs into the green sector, typically resting between 1 and 1.5 bar. Immediately rotate both valve handles back to their original closed position—perpendicular to the pipe—to seal the system off from the mains supply. Double-check that the hissing sound has completely stopped to ensure you haven’t left a valve slightly ajar, which would continue to increase boiler pressure dangerously while you walk away. While this external hose method is standard for many setups, modern Worcester Greenstar models often feature a built-in mechanism that requires no external piping at all. If you cannot find a silver hose, your unit likely utilizes the internal method known as operating integrated filling link. This newer design removes the guesswork of external plumbing, allowing for repressurising heating system via blue levers located securely underneath the boiler chassis. The Keyless Greenstar Alternative: Operating the Integrated Blue Levers Owners of newer models, specifically the “Greenstar i” or “Compact” series, benefit from a cleaner design that eliminates the external hose entirely. Instead of hunting for loose pipes, look underneath the boiler casing for a distinct blue plastic lever.
Is a Leaking Condensate Pipe Dangerous?
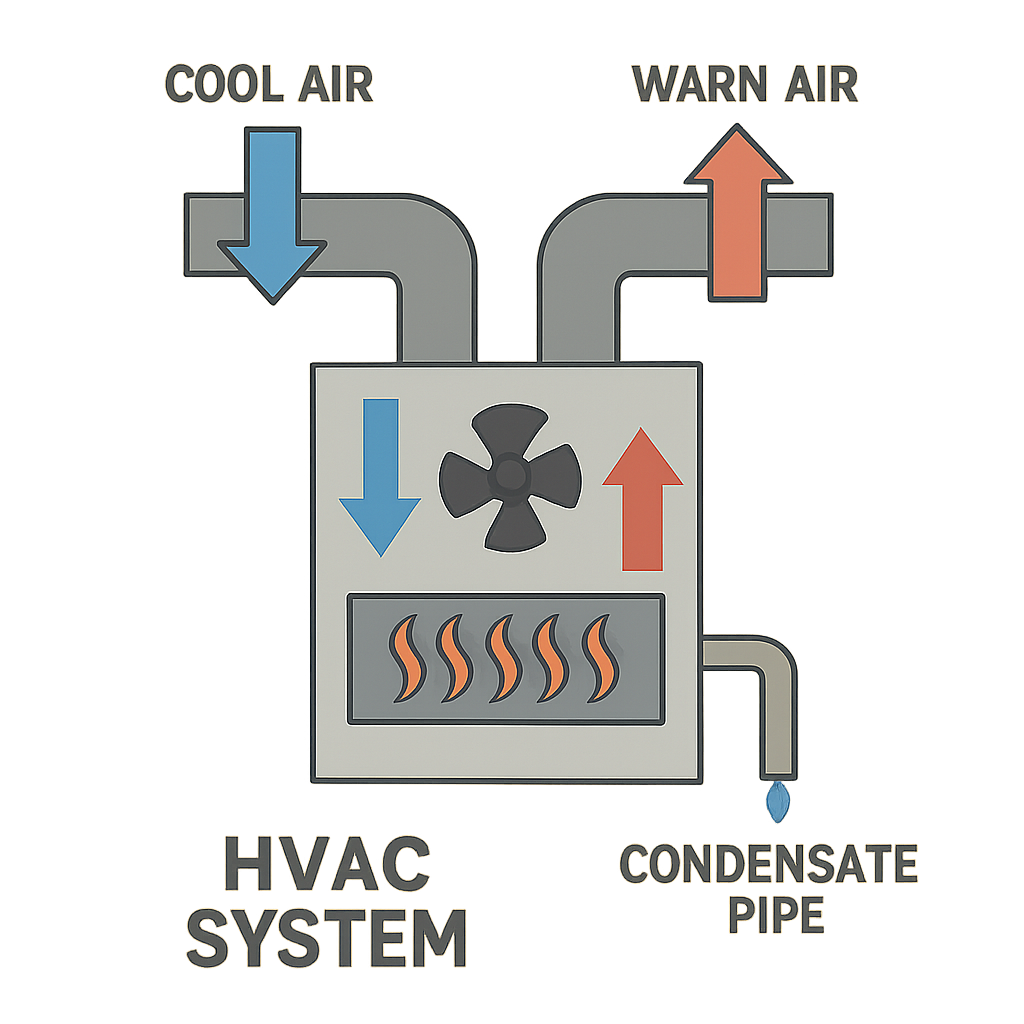
A leaking condensate pipe might seem minor, but it can lead to serious issues. These pipes are part of your HVAC system, designed to drain excess moisture. When they leak, they pose risks of water damage to your home. Moisture damage from leaks can cause mould growth, which is a health hazard. Mould can spread quickly, affecting air quality and causing respiratory issues. Water damage can also weaken your home’s structure over time. This can lead to costly repairs and even compromise the safety of your home. Increased humidity from leaks can damage belongings and create discomfort. It’s crucial to address leaks promptly to prevent these problems. Regular maintenance of your HVAC system can help prevent leaks. Understanding the signs of a leaking condensate pipe is key to protecting your home. What is a Condensate Pipe and How Does it Work? A condensate pipe is an integral component of HVAC systems. Its primary role is to channel and expel excess moisture generated during system operation. This moisture forms when your HVAC system cools or dehumidifies air. This pipe typically runs from your HVAC system to the outside of your home. It prevents water accumulation, which could lead to damage. Without this pipe, the moisture would have nowhere to go, increasing water damage risks. The process works through condensation. As warm air passes over cold evaporator coils, it cools down and moisture condenses. This water then drains away via the condensate pipe. Key functions of the condensate pipe include: Ensuring the condensate pipe is functional can help keep your HVAC system efficient. Proper operation of this pipe prevents both moisture and structural damage. Common Causes of Condensate Pipe Leaks Leaks in condensate pipes can arise from several common issues. One prevalent cause is blockages, often due to debris or algae build-up inside the pipe. These blockages prevent water from draining properly, leading to leaks. Corrosion is another factor that contributes to leaks in condensate pipes. Over time, pipes can degrade, resulting in cracks or holes through which water can escape. Improper pipe installation is also a frequent culprit. If the pipe is not correctly aligned or secured, leaks may occur. Ensuring a correct slope is crucial for effective drainage. Physical damage to the pipe, perhaps from external forces or pressure, can cause leakage as well. Here are some typical causes of leaks: Identifying these issues early can save homeowners from extensive repairs. Regular inspection of the condensate pipe can help in detecting potential problems before they escalate. Signs and Symptoms of a Leaking Condensate Pipe Recognising the signs of a leaking condensate pipe is key to preventing severe damage. Water stains appearing on walls or ceilings can indicate a leak. These stains are often discoloured patches caused by the water seepage. Dampness around the HVAC unit is another common symptom. If the area feels unusually moist, it may indicate a leak. Unpleasant odours are a subtle yet significant sign. Stagnant water from leaks can result in musty smells in the home. Listen for unusual sounds such as dripping or gurgling noises near the HVAC system. These can suggest water is not flowing properly. Here’s a quick checklist for spotting leaks: Regular checks can help catch these indicators early and prevent costly repairs. Is a Leaking Condensate Pipe Dangerous? Yes, a leaking condensate pipe can be dangerous. It poses several risks to your home’s safety and integrity. Water seeping from a leak can slowly cause structural damage. Over time, wooden components may warp or rot. Metal parts can corrode, leading to further issues. Additionally, leaks can increase humidity levels indoors. This creates an uncomfortable living environment and potentially damages belongings. Moisture from leaks encourages mould growth. Mould not only harms surfaces but can also compromise air quality, posing health threats. Electrical systems might be at risk too. Water damage can lead to short circuits, creating fire hazards. Here are the dangers associated with leaking pipes: Leaks can also result in financial strain. Increased utility bills due to inefficient HVAC operation is common. Repairing extensive water damage can be costly if not addressed promptly. Financial repercussions of leaks include: By addressing condensate pipe leaks early, you can safeguard your home and health whilst saving money in the long run. Water Damage Risks from Leaking Condensate Pipes Leaking condensate pipes may lead to severe water damage risks in homes. Water can seep into floors, walls, and ceilings. Over time, this can weaken structural components, leading to costly repairs. Another risk involves the home’s interior finishes. Wallpaper and paint may begin to peel or bubble. This not only affects aesthetics but also decreases property value. Additionally, water damage can lead to the growth of mould and mildew. These fungi thrive in damp environments and can spread quickly. Their presence can cause health problems and further structural damage. Furniture and personal belongings are also at risk. Water can stain, warp, or ruin items near the source of a leak. Damage can extend to electronics and appliances, potentially leading to malfunctions. Key water damage risks include: Early detection and repair of leaks are crucial. Addressing issues promptly can mitigate the extent of water damage. Maintaining the health and safety of your home depends on proactive measures. Moisture Damage and Its Impact on Your Home Moisture damage occurs when water vapour accumulates in areas it shouldn’t. Leaking condensate pipes contribute significantly to this issue. Prolonged exposure to excess moisture can lead to pervasive damage in homes. One major impact is the deterioration of building materials. Wood, plasterboard, and insulation can absorb moisture and degrade. This can compromise the home’s structural integrity over time. High humidity levels, facilitated by leaks, create a welcoming environment for pests. Insects such as termites thrive in moist conditions. Their presence can result in additional damage and expenses. Moisture can also cause finishes and fixtures to fade or warp. This affects the visual appeal of a space and requires repair or replacement. Preserving home aesthetics hinges on effective moisture control. Key impacts of
How to Release Push Fit Plumbing Fittings
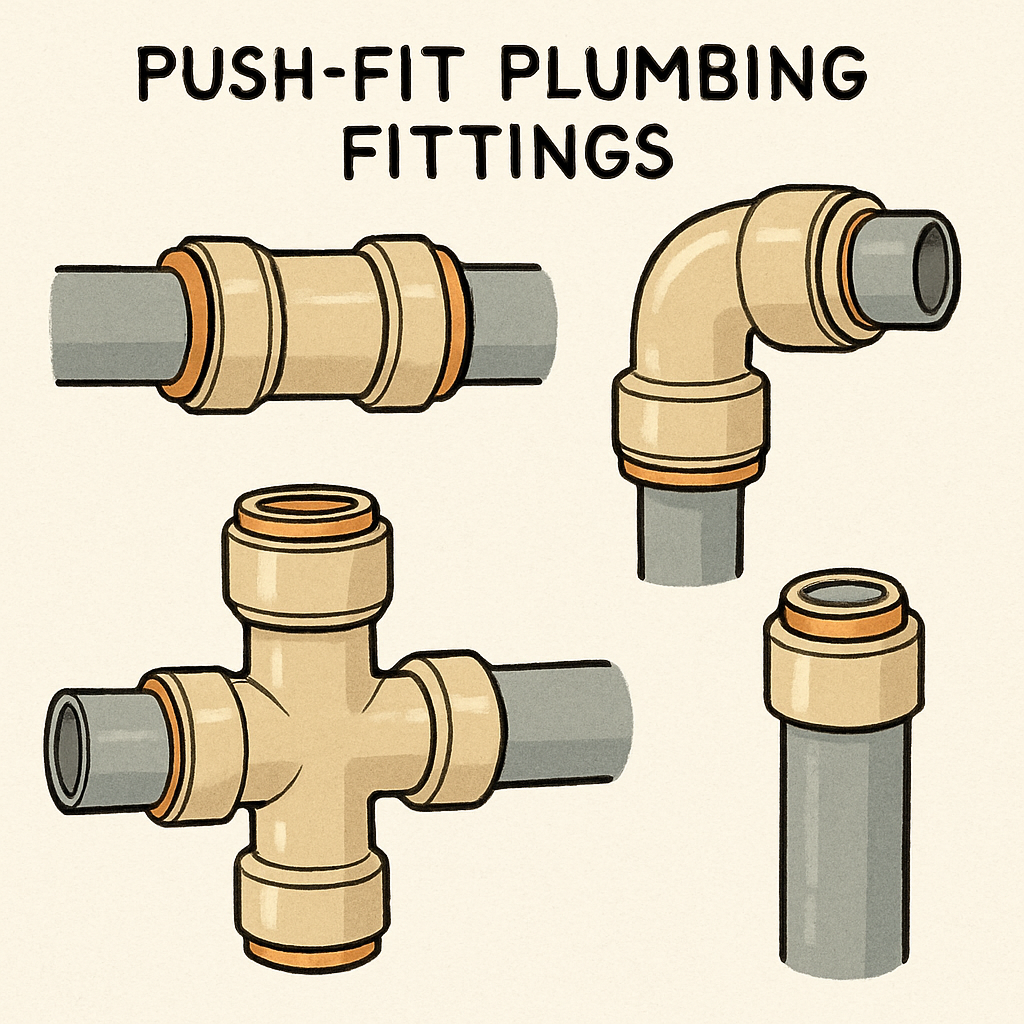
Push fit plumbing fittings are a game-changer for DIY enthusiasts and homeowners. They offer a quick and easy way to connect pipes without the need for soldering. These fittings are popular for their simplicity and efficiency. They are used in both copper and plastic plumbing systems. Understanding how to release push fit plumbing fittings is essential for any plumbing project. It ensures you can make adjustments or repairs when needed. This guide will walk you through the process step-by-step. You’ll learn about the tools required and the techniques involved. Whether you’re a beginner or have some experience, this guide will help you master the task. With the right knowledge, you can handle plumbing tasks with confidence. Let’s dive into the world of push fit plumbing fittings and discover how to release them effectively. What Are Push Fit Plumbing Fittings? Push fit plumbing fittings are essential components used to join pipes quickly and efficiently. They eliminate the need for welding or adhesives, making them ideal for both novice and experienced plumbers. These fittings are compatible with various plumbing materials, including copper, PEX, and CPVC. This versatility allows them to be used across different plumbing systems. Push fit fittings are popular due to several advantages: These fittings use an O-ring and a gripping mechanism to create a watertight seal. The O-ring is crucial as it prevents leaks and ensures durability in various water systems. Their user-friendly design makes them perfect for tight spaces or quick fixes. Whether you need a temporary repair or a permanent solution, push fit fittings are a reliable choice. They simplify complex plumbing tasks, bringing convenience and efficiency to your home projects. How Push Fit Fittings Work: The Basics Understanding the mechanics of push fit fittings helps ensure a secure installation. These fittings create a seal using a combination of an O-ring and a gripping mechanism. This design ensures a leak-proof connection in both water and gas applications. The process begins when a pipe is inserted into the fitting. The pipe pushes past a series of metal spurs inside the fitting. This action locks the pipe in place while the O-ring creates a watertight seal. Key features of push fit fittings include: These features make push fit fittings a popular choice for both new installations and repairs. Their user-friendly design eliminates the need for bulky tools or extensive training. This ease of use makes them especially appealing for quick fixes and DIY projects. The versatility of push fit fittings enables efficient connections while maintaining reliability and durability. Tools and Accessories Needed to Release Push Fit Fittings Releasing push fit fittings requires specific tools to ensure precision and safety. The most essential tool is a disconnect clip or tongs designed for the fittings. This tool compresses the release collar, allowing the fitting to detach from the pipe with ease. Before starting the process, it’s important to gather additional plumbing accessories. You may need a pipe cutter for trimming, as well as a deburring tool to smooth pipe edges after removal. These tools help prepare the fitting and pipe for either reattachment or new installations. Here is a list of common tools and accessories: Having these tools readily available simplifies the process. This readiness not only ensures a hassle-free experience but also enhances the overall quality of your plumbing task. Proper tools are crucial for effective and safe removal of push fit fittings. Step-by-Step Guide: How to Release Push Fit Plumbing Fittings Releasing push fit plumbing fittings is a straightforward task when done correctly. The key is to follow a systematic approach. Ensuring that you have the right tools and a clear plan is essential. Firstly, make sure to turn off the water supply. This is crucial to prevent leaks and flooding. Always double-check that the water is off before proceeding. Use the disconnect clip or tongs on the fitting’s release collar. These tools are designed to apply even pressure around the collar. Ensure the tool is properly positioned for effective compression. Gently push the tool against the release collar while pulling the pipe. The pipe should slide out effortlessly when done correctly. It’s important not to force it, as this could damage both the fitting and the pipe. To check for leaks, inspect the area once the pipe is removed. Use a cloth to wipe away any moisture. Be thorough, as this ensures no future water damage. Before reusing the fitting, inspect it for signs of wear or damage. Look for any visible cracks or debris. If the fitting looks compromised, replace it immediately. For guidance, here are the essential steps summarised: If reusing the fitting, ensure that the pipe ends are smooth and clean. Use a deburring tool if necessary, preparing them for a reinstallation. This step guarantees a watertight seal when reattached. Taking your time and following each step carefully is essential. It ensures a successful fitting release without damage. With practice, releasing push fit fittings becomes a quick and simple task. Tips for Removing Push Fit Copper Plumbing Fittings When working with push fit copper plumbing fittings, extra care is required. Copper is a durable yet malleable material. Handling it gently prevents unnecessary damage. Use a proper disconnect tool designed for copper fittings. This tool ensures a smooth removal process without damaging the pipe. It is essential for maintaining the integrity of copper pipes. Before removal, prepare the area by cleaning the pipe and fitting. Any debris can hinder the release process. A clean working environment contributes to a more successful outcome. Here are some helpful tips: Remember, patience is crucial when dealing with metal pipes. Carefully executing each step ensures a quick and successful removal process. Following these tips makes handling copper fittings less daunting. Troubleshooting: Common Problems and Solutions Facing issues while removing push fit plumbing fittings is not uncommon. Input (British English): These problems usually arise from incorrect techniques or suboptimal conditions. Understanding these challenges helps in finding effective solutions. A frequent issue is leakage after reinstallation. This often occurs when the