
How Long Does It Take To Install A Radiator
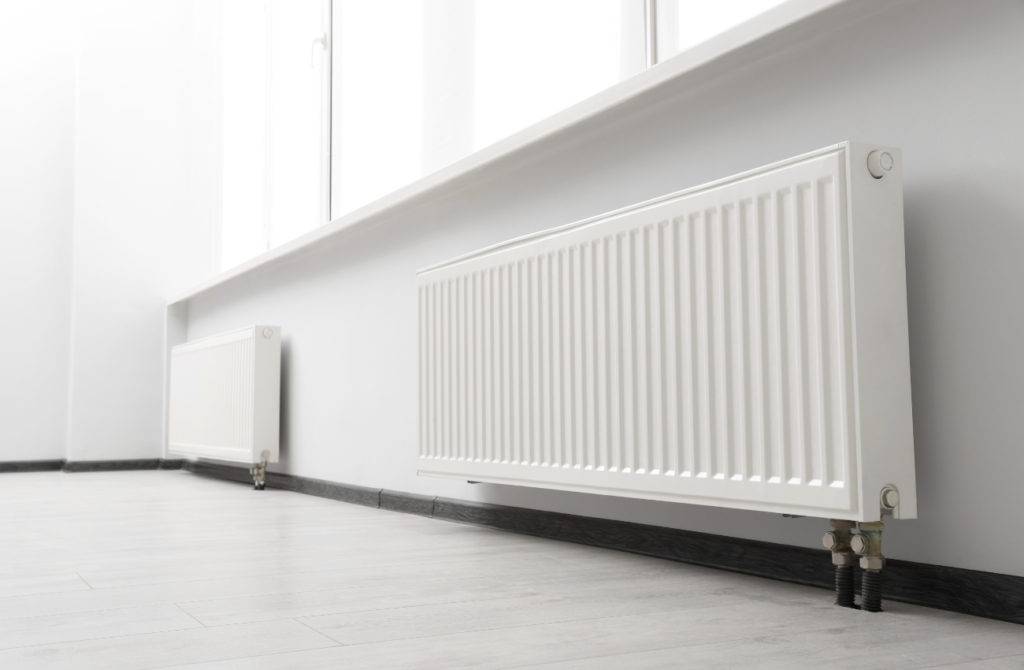
Installing a radiator can feel daunting. If you’re asking how long does it take to install a radiator, the answer depends on the radiator type, the plumbing, and whether you hire a pro. A simple swap may be quick. A full radiator installation can take longer if the pipework needs changes. Professional fitting is often faster and safer. DIY can save money, but it may take more time if you are new to the job. Costs can range from £200 to £1,000. The final price depends on the radiator, the room, and any extra plumbing work. Finding a reliable installer matters. Local experts can keep the job smooth and help avoid leaks. Average Time to Install a Radiator The average radiator installation time is usually 2 to 4 hours. This can change if the pipework is old or the room is hard to reach. A professional can often finish in a few hours. They work faster because they know the system and have the right tools. DIY work usually takes longer. Tasks during installation include: Access can affect installation time. Easy-to-reach spaces are quicker. Tight spaces, complex pipework, or awkward layouts can add time. Good planning and the right tools help keep the work on track. Key Factors Affecting Radiator Installation Time Several things can change how long a radiator fitting takes. The condition of the existing pipes is one of the biggest factors. Newer homes often have easier pipework. Older homes may need extra work, which can slow the job. The radiator type also matters. Some models need different brackets or stronger wall support. Access is important too. If the area is hard to reach, the job will take longer. Key factors include: Knowing these factors helps you plan better. It can also reduce delays and make the radiator installation more efficient. How to Install a Radiator Installing a radiator yourself can be rewarding, but it needs care. Start by gathering the right tools and materials. Before you begin, switch off the central heating. Drain the system so water does not spill during the work. Measure the wall and mark the bracket points. Use a spirit level so the radiator hangs straight. Fix the brackets firmly to the wall. Make sure they can support the full weight of the unit. Lift the radiator into place. Connect it to the existing plumbing with the right fittings. When the job is done, refill the system. Turn the heating back on, check for leaks, and bleed the radiator to remove trapped air. Quick checklist: These steps can help you install a radiator safely. If you are unsure, ask a professional for help. How Long Does It Take to Install a New Radiator vs Replace an Old One? If you are wondering how long does it take to install a new radiator, expect about 3 to 4 hours. A new unit may need fresh pipework, bracket work, and careful alignment. Replacing an old radiator is often quicker. It usually takes 2 to 3 hours because the pipework is already in place. Time can still change based on: If the plumbing is in good shape, replacing an old unit can be straightforward. If problems show up, you may need a professional. How Long Does It Take to Install a Radiator Fan? Installing a radiator fan can improve heat spread in the room. It usually adds 1 to 2 hours to the job. The time depends on: The fan should fit well with your system. Some fans need minor electrical work. A professional can make the job faster and lower the risk of mistakes. Proper installation can improve output and efficiency. Focus on this step to improve heating performance in your home. DIY vs Professional Radiator Installation DIY installation can suit people who like hands-on work. It may save money, but it often takes longer because you must learn as you go. A professional brings speed and skill. In many cases, they can finish the job in a day. They also have the tools to handle surprises. Think about: DIY can cut labour costs, but mistakes can be expensive. A pro may cost more, yet they can reduce delays and provide peace of mind. Choose the option that fits your budget and skill level. Radiator Installation Cost: What to Expect Radiator installation cost depends on the radiator and the room. In many cases, the total cost is £200 to £1,000. Labour makes up a large part of the bill. A professional may charge more, but that price often includes skill and speed. Extra plumbing work can raise the cost. Materials add to the total too. You may need pipes, brackets, or valves. Better parts can cost more, but they can also last longer. Prices can also change by region. It helps to get a few quotes before you decide. Typical cost factors: Good budgeting makes the job easier to plan. It also helps you avoid surprise costs during radiator installation. Finding Radiator Installers Near Reading Finding radiator installers near me can save time and stress. A local specialist can check the site and give a fair quote. Start with online reviews and local listings. They can help you compare services and prices. Ask friends, family, or neighbours for recommendations. Personal advice often leads to reliable results. You can also search for a plumber in Reading or another nearby area if you want local help. Useful places to look: These options can help you find a trusted installer for radiator installation near me searches and similar local jobs. Radiator Plumbing and Safety Precautions Radiator plumbing is a key part of the job. It connects the radiator to your central heating system. This work must be done with care to prevent leaks. Safety is just as important. Turn off and drain the system before you start. That helps protect your home from water damage. Keep these safety tips in mind: Good safety habits help the installation go smoothly and reduce the chance of later problems. Frequently
How To Use Central Heating Thermostat
A central heating thermostat is one of the simplest ways to make your home feel more comfortable while keeping heating costs under control. It tells your heating system when to switch on, when to switch off, and what indoor temperature to maintain. Used well, it can improve temperature regulation, reduce wasted heat, and make everyday home heating much easier to manage. If you’re searching for how to use central heating thermostat features effectively, this guide explains the essentials of heating control for comfortable, energy-efficient home heating. Many people only use their thermostat to turn the heating up when the house feels cold. But modern heating control can do much more than that. Whether you have a basic wall dial, a programmable thermostat, a wireless central heating thermostat, or a smart thermostat connected to your phone, understanding the right thermostat settings can help your system run more efficiently and consistently. Below, we’ll explain how central heating thermostats work, how to set one correctly, what common mistakes to avoid, and when it may be time to call a qualified heating engineer. What a central heating thermostat actually does A central heating thermostat measures the air temperature in your home and compares it with the temperature you have selected. If the room is colder than your chosen setting, the thermostat asks the boiler or heating system to provide heat. Once the room reaches the set temperature, it tells the system to stop heating. In simple terms, the thermostat is not a “speed control” for your heating. Turning it up very high does not usually make your home heat faster. It simply tells the heating system to keep running until the room reaches that higher temperature. This is one of the most common causes of wasted energy. For example, if you want your living room to reach 20°C, setting the thermostat to 25°C will not normally warm the room faster. It may just keep the heating running longer than needed. Good thermostat use is about choosing a comfortable temperature, setting a sensible schedule, and allowing the system to work steadily. Common types of central heating thermostat Not every home has the same type of thermostat. The way you use yours will depend on the model and the heating setup. Manual room thermostat A manual thermostat is usually a simple dial or basic digital control. You choose a temperature, and the heating comes on or off depending on the room temperature. This type is easy to use but less flexible. You may need to adjust it manually when you leave the house, go to bed, or want different temperatures throughout the day. Programmable thermostat A programmable thermostat lets you set heating times and temperatures in advance. For example, you can programme the heating to come on before you wake up, reduce during the day, and warm the home again in the evening. This is a popular option for households with regular routines. It offers better heating control than a simple dial because you are not relying on memory to turn the heating down. Wireless central heating thermostat A wireless central heating thermostat communicates with the boiler or receiver without a fixed wired connection between the control unit and the boiler area. This can make thermostat installation easier in some homes because the thermostat can often be positioned where it measures the room temperature more accurately. A radio controlled central heating thermostat works in a similar way, using a radio signal between the thermostat and its receiver. These are useful where running new wiring would be disruptive. WiFi and smart thermostats A wifi central heating thermostat connects to your home internet, allowing app-based control. A smart thermostat may also learn your habits, track occupancy, provide energy reports, or integrate with voice assistants and other smart home devices. A remote control thermostat for central heating is especially useful if you travel often, work irregular hours, manage rental property, or simply want to turn the heating on before arriving home. Brand-specific thermostats Many homes use established brands such as a Honeywell central heating thermostat, Drayton, Hive, Nest, tado°, or similar systems. The basic principles are usually the same, but the buttons, menus, wiring, and app features vary. Always check the manufacturer’s instructions before changing advanced settings. Best place to position a thermostat A thermostat can only make good decisions if it is measuring the right temperature. Poor placement can cause the heating system to switch on or off at the wrong time. Ideally, a room thermostat should be: If your thermostat is in a cold hallway, it may keep calling for heat even when the living room is already warm. If it is near a radiator or sunny window, it may switch the heating off too early. In either case, moving or replacing the thermostat can improve comfort and energy efficiency. How to set your central heating thermostat The right setting depends on your home, insulation, household needs, and comfort preferences. However, most homes work best with a steady, moderate setting rather than frequent big changes. A common approach is: If your home feels cold at your usual setting, the issue may not be the thermostat. It could be poor insulation, air in radiators, an underperforming boiler, incorrect boiler flow temperature, blocked filters, or radiator balancing problems. Using a programmable thermostat effectively A programmable thermostat can make central heating simpler, but only if the schedule matches your routine. Start by thinking about when your home actually needs heat: Many people set programmes once and then forget them for years. It is worth reviewing your thermostat settings when your work pattern changes, children’s schedules change, tenants move in, or winter weather becomes more severe. How to use a smart thermostat A smart thermostat gives you more flexible heating control. Depending on the model, you may be able to adjust the temperature from your phone, set different schedules for weekdays and weekends, use geofencing, monitor energy use, or control separate heating zones. To get the best from a smart